Using Tile Manager
Overview
For those customers with a TecnologyOne Tile Engine license the Spatial Cloud includes a functional Tile Manager that provides a tile service for customers wishing to create tile sets for use as basemaps in IntraMaps, Standard Embedded Mapping as well as many other applications. Use of this service without the appropriate license will result in the suspension or removal of this service and may incur a fee.
This article outlines the steps required to configure and publish a tile set in Tile Manager.
Tile Manager can be launched under the Spanner (Tools) button in MapManager

For additional information on the function outlined below, check the MapManager and ConfigManager Help Guides
Map
Tile Manager is built to deploy an existing Map as a tile set, and therefore needs an existing map to be loaded in MapManager the first time the Tile Manager is used. This article does not cover map creation and assumes a map has already been created. If attempting to load Tile Manager
Matrix Set
Before creating any tile sets in a new environment, a Matrix Set must first be created. A Matrix Set is used as a reference to set the CRS, extent and default number of levels for any tile set created.
As Web Mercator will be the most common Matrix Set to use, it will be used as the example in this article.
To create a Matrix Set first ensure a map is loaded and then launch Tile Manager
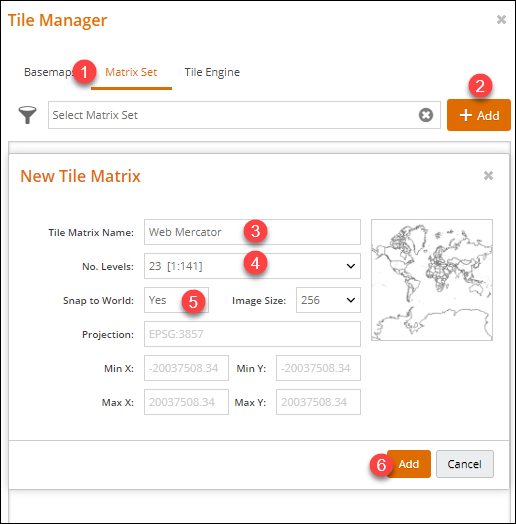
- Select Matrix Set tab
- Click + Add. This opens the New Tile Matrix panel
- Enter a Tile Matrix Name. E.g. Web Mercator
- Set No. Levels.
Note: 23 levels are recommended for Web Mercator - This step is for Web Mercator ONLY. Set Snap to World to Yes
- Click Add
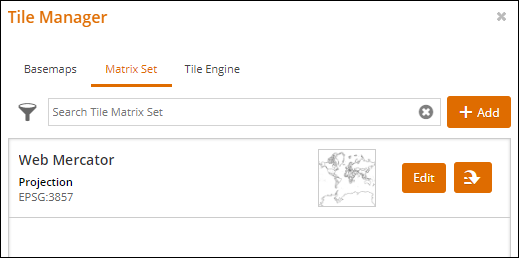
The new Matrix Set will then display in Tile Manager
Tile Set
To create a Tile Set first ensure a map is loaded, a Matrix Set has been created and then launch Tile Manager
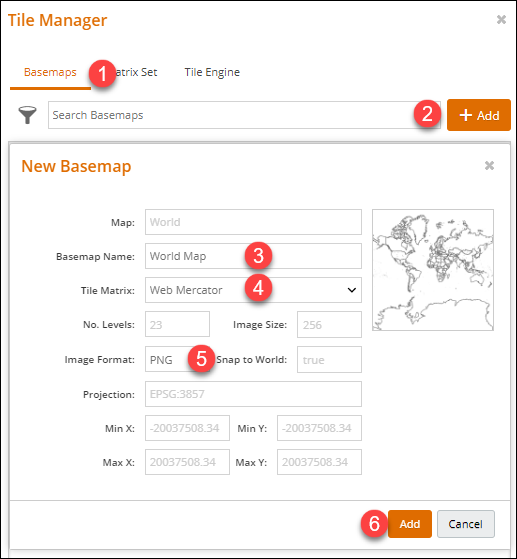
- Select Basemaps tab
- Click + Add. This opens the New Basemap panel
- Enter a Basemap Name. E.g. World Map
- Select Tile Matrix
- Select Image Format.
If your map includes aerial imagery ensure you select the JPEG format will be more efficient as it creates smaller image sizes, reducing impact of network speed. - Click Add
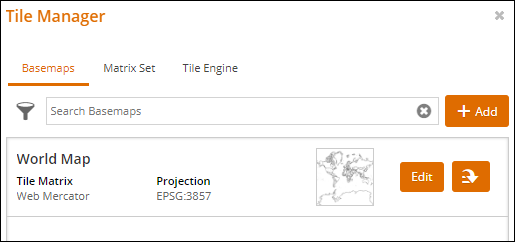
The new Tile Set will then display in Tile Manager
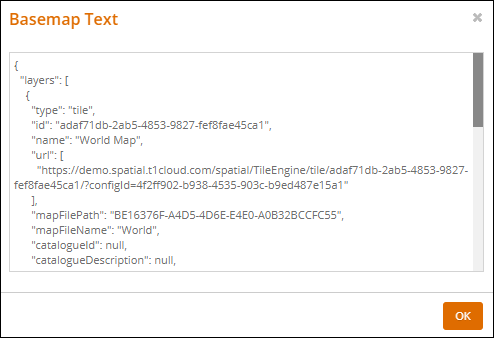
If needed you can view the basemap text for the new tile set:
- Click the secondary action button
- Select View Basemap Text

Create Tile Set from Spatial Catalogue
If only creating a single layer as a Tile Set, for example your latest aerial imagery, this can now easily be actioned from the Spatial Catalogue.To accomplish this you must first have created the relevant Matrix Set you wish to use.
Use the Spanner (Tools) button in MapManager to open Spatial Catalogue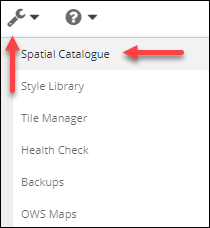
Find the Catalogue Item you wish to create a tile set for and:
- Click the Secondary Action button
- Select Create Basemap
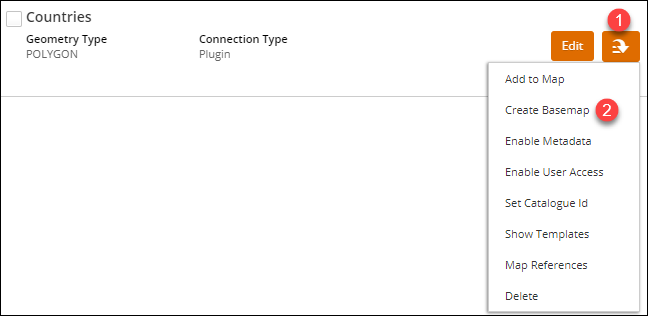
This opens the New Basemap panel. To finish creating a tile set for your selected catalogue item, follow steps 3 to 6 under the Tile Set heading above.
Adding Basemap to IntraMaps Configuration
All tile sets created in Tile Manager are available to easily add to a basemap series in IntraMaps Configuration
To add a new tile set as a basemap, ensure ConfigManager is open and:
- Click the Spatial tab
- Select a Basemap Series
- Click the + button
- Select your new Tile Set. All tile sets created in Tile manager are automatically available in the Template drop down.
- Click Apply
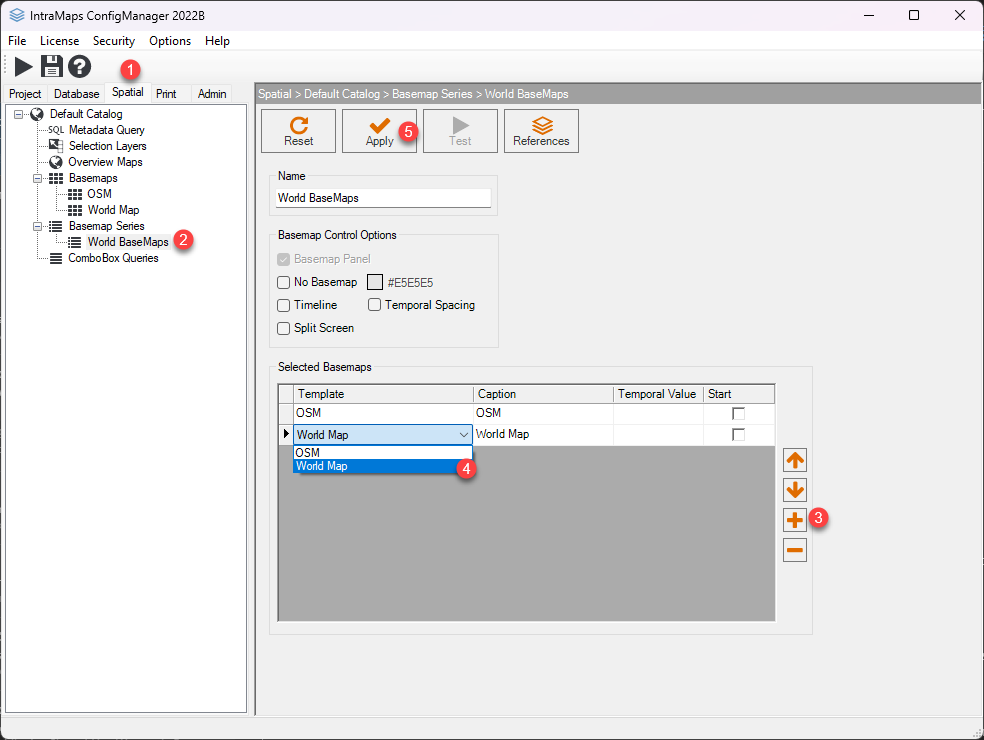
If a Basemap doesn't already exist for a new tile set added to a Basemap Series, it will be automatically created.